A printer in Japanese has asked me more about how the palm press could be used to print small editions by offset on her kitchen table, so I agreed to discuss this technique. While there is information out there on how to print directly from plate to paper using the palm press, the idea of using offset has much to recommend it. There is not as much pressure available from using a palm press and flats are difficult to produce, just as in traditional and waterless processes when using a proper press. For this reason I know of lithographers who turn to screen printing their flats, probably using oil based ink. While direct printing of fine detail or toner washes produce very good results, flats are what we want to produce without salt and pepper effects .
On this blog, I recently published a simple but effective pin registration system, using thumbtacks and a piece of scrap aluminium. This becomes the basis for the offset system, using a piece of discarded offset lithographic press blanket one should be able to get from your friendly local commercial printer. For making the offset system, I recommend a larger sheet of aluminium plate so that a set of registration pins can be placed at both ends of the metal. This unit could be set aside when not needed, then put to use quite easily instead of having to assemble the pieces each time.
 I have never recommended the palm press for large multicolor editions that would normally require a proper press, but smaller projects could be undertaken when a press is not available. In this case I chose a used plate that had been printed by waterless process, so still had silicone on the ball grained side, which had to be removed to allow the masking tape to secure the thumbtack. I found a piece of old offset blanket in my studio and cut it just a bit larger than the plate so that there was plenty of room to roll around without going off the surface.
The plate with the image is considerably smaller, containing an image I used many years before to print a multicolor edition for a print exchange at the SGC conference in Miami. It was the Chinese year of the dragon, so a friendly creature was needed to mark the occasion. The edition was multicolor printed by direct process, so this is a mirror image of that edition. This much abuse plate seemed good enough to use for the series of pictures to explain how offset can be used. A set of thumbtack holes were put next to the punched ones at the top of the plate.
Using my original pin system, I punched holes at both ends of the large plate that was to become the press bed for the entire assembly. This system can be considered temporary, but a much sturdier one can be made of other materials, as long as pins can be made ridged and stationary. Use your imagination with the materials at hand. Since there are four pins needed for good registration, a method of identifying their placement in relation to the blanket and plate/paper position should be recorded for farther use. The blanket is not removed from the pins until time for cleanup, while the holes in the blanket that fit over the plate/paper position should be highlighted to make them easier to find. in fact all holes should be marked on the fabric side for this reason.
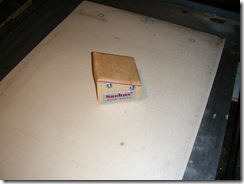
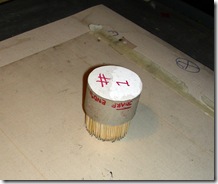
I have printed the plate using the palm press, Ozukas’ toothpick baren and finally a bottle with a smooth circular ridge at the bottom. Compare the quality of black on each of the proofs on newsprint to find that the greater possible pressure from the palm press produces a solid line. While the bottle looks like the best bet if a palm press in not available, it still has broken area in the enlarged image. To print with a toothpick baren or bottle, requires that a sheet of greased Mylar is put over the back of the offset blanket, which will make pushing the tools around much easier. You can notice the Mylar with a piece of masking tape stuck at the edge, on top of the fabric.


These are the printed images from the plate, using the different pressure methods.
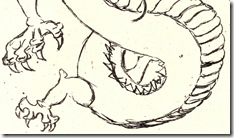
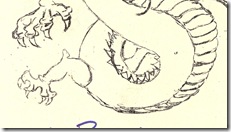
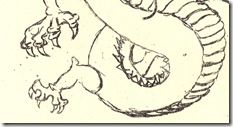
These closeup scans gives you a better picture as to the quality of the printed lines. Toner textures are printed very well with offset, as long as you take the trouble to make sure the blanket is registered very accurately with the plate when receiving the ink.
The blanket is separated from the system for easier cleanup. Washing the blanket to remove the ink, I used one of my detergent mixtures that I modify to easily dissolve the ink. No solvent was used for cleanup of any equipment used in this demonstration.
While more problematic editioning using this simple offset method, it can allow a printmaker who has no access to a proper press, to still do small color editions. The characteristics of the offset rubber blanket allows the ink to be pushed down into the fibers of the paper much better than from direct contact of plate to paper. This gives the offset technique an advantage over the direct method.





Hi. I find your blog really informative. It’s good that you always have photos, too, to break the text and make everything else easy to understand. I am not into printmaking but I have a couple of friends who are. I have sent them the link to your blog because I know they will enjoy it more than I do.